Last updated Feb 03, 2026 at 03:12am
There have been a few questions regarding the installation of cursors into Windows. I have a basic guide on how to do it on Windows XP but I guess it's confusing. So I'm writing one up specifically for Windows 7, and Windows Vista as well. All our cursors are checked to be working with Windows XP, Vista, and 7 so there shouldn't be a problem. Also it probably will also work with Windows 8.
1. Find The Cursor
Look through the site, and look for the cursor you want to use. The navigation of the site is on your left. Click on any of those links. You can also use the Search.
2. Download The Cursor
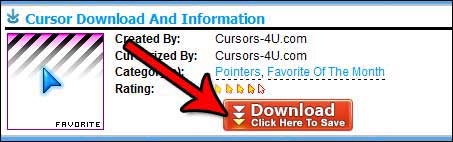
You can either use the provided code to place the cursor on your web page. But because this tutorial is "how to install cursors..." you will most likely download the cursor. To download the cursor click on the red "Download" Button. Then save it.
3. Save It In The Cursors Folder
Unlike Windows XP and Windows Vista, you can't save cursor files anywhere you want and use them, but a few have reported that on Windows 7, once you restart your computer the custom cursor reverts back to the original cursor. To prevent that from happening you have to save it in the Windows Cursors Folder. The folder can be located in your local c:drive or where the main OS was installed.
- Click on "Start" orb button
- Click on "Computer"
- Click on "Local Disk (C:)
- Click on "Windows" Folder
- Click on "Cursors" Folder
Go ahead and save your cursor in this folder. You should also save all further cursors you download in here as well.
4. Change Your Mouse Settings
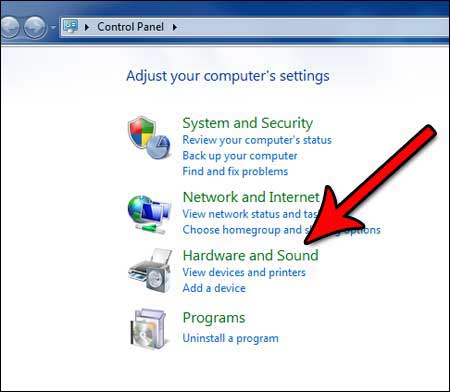
Okay, the next step is to get into the control panel. To get to the control panel just hit the windows orb logo (start button) on your screen and choose Control Panel. THen choose the "Hardware and Sound" option.
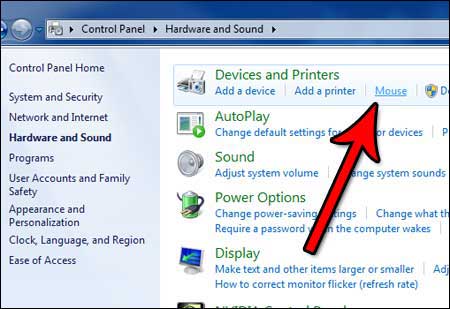
Next up under "Device And Printers" there should be an option for "Mouse".
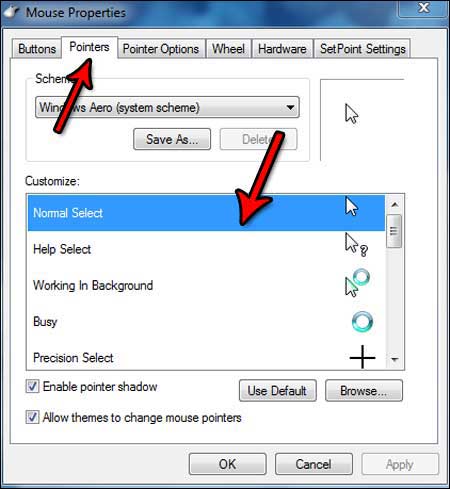
Go ahead and click on that. The mouse control panel should appear next (look at the picture below).
Our next steps are pretty easy as well.
- Click On "Pointers" Tab
- Under the "Customize Area" click on one of the pointers. This example click on "Normal Select"
- Next click on "Browse" and choose the cursor you want to replace the normal select with
- Click on "Apply" or "OK"
And you are done. If you downloaded a cursor set on our site, you're gonna have to manually change all the pointers to the one's that match. That is pretty much it. If you got any questions or need further help, leave a comment below.
Comments