Last updated Sep 10, 2026 at 01:24am
In our last update back in August, I mentioned that we were working on a comprehensive submission guide for Cursors-4U. This is sorta it, but it mostly touches four main issues I am seeing from submissions.
Along with the guidelines, we've also updated the Cursor Editor with new tools and pre-submission checks that catch these problems right on your canvas before you ever hit submit. Most rejections boil down to three common oversights: a hotspot left in the corner or some random spot it shouldn't be, a tiny drawing floating inside an oversized canvas, or an accidental blank frame in an animation. Here is how to avoid them, why they matter, and how the new editor features make fixing them quick and painless.
Cursor Submission Golden Rules
1. Set your hotspot on the active point
The hotspot is the single pixel coordinate that Windows registers as the actual click location. It isn't automatically centered, and it doesn't automatically locate the tip of your shape. It's a specific pixel coordinate that you designate.
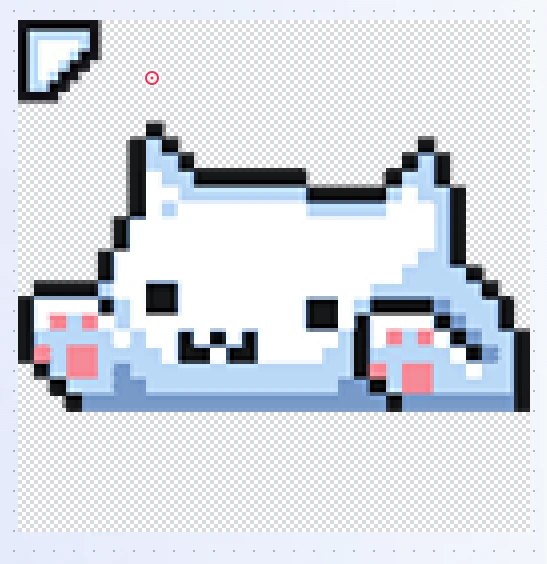
The red dot in the image to the right is the hotspot of the cursor. It should be at the tip of the pointer arrow.
By default, new canvases start with the hotspot at coordinate 0, 0 (the top-left corner). On almost every cursor, that top-left corner is completely transparent. If you never set the hotspot, every click your users make registers in empty space above and to the left of where they pointed. Clicking buttons becomes frustrating, text selection starts in the wrong spot, and precision tasks feel broken.
On larger canvases like 64×64 or 128×128, an unset hotspot at 0, 0 can sit dozens of pixels away from where the cursor appears to point.
Where to place it depends on the role of the cursor:
- Normal Select (pointers & arrows): The very tip of the arrow point.
- Link Select (pointing hands): The tip of the index finger.
- Text Select (I-beam): The vertical center of the beam.
- Precision Select (crosshairs): The exact intersection of the cross lines.
- Move & Resize arrows: The geometric center.
- Busy & Working in Background: The center of the spinner or hourglass, or the arrow tip if paired with a pointer.
There is one valid exception: cursors intentionally designed with an open center, such as a hollow circle or target reticle. In those cases, having the hotspot sit on a transparent pixel in the center makes total sense. The editor recognizes whether you manually positioned the hotspot or simply left it on the default 0, 0 coordinate, and treats deliberate placements much more leniently.
You can easily test this in the editor before submitting. Open the Live Preview panel, hold down your mouse button, and drag. The preview draws a hotspot trail directly from the pixel Windows will use. If that line starts in empty space beside your artwork, that's where your clicks will land too.
2. Fill your canvas (don't leave giant empty margins)
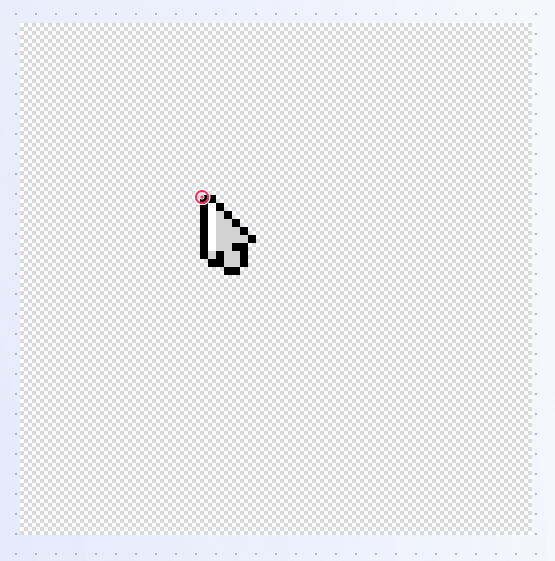
This is another common issue we see in the moderation queue, and it's also the one that causes the most damage to your artwork.
When you create a .cur or .ani file, the format stores your image on a canvas of fixed dimensions, like 64×64 or 128×128 pixels. The cursor file has no concept of where your artwork begins or ends inside that square. If you draw a 24×24 arrow in the center of a 128×128 canvas, Windows and our site both treat that entire 128×128 box as the cursor, even though most of it is invisible.
That becomes a serious problem the moment the cursor gets scaled. Windows determines your cursor's rendered size based on your display's DPI scaling (such as 100%, 150%, or 200%) and your pointer size slider in accessibility settings. When Windows needs to display a cursor at 32 pixels, it takes your file and scales the whole canvas down to 32 pixels.
Because the cursor format doesn't track your artwork bounds, Windows can't isolate your drawing and scale only that. It scales the empty padding right along with the artwork. The ratio of drawing to empty space is permanently locked in:
- An arrow drawn to fill most of a 128×128 canvas, scaled down to 32px, gives you a crisp, full-sized 32px cursor.
- That same arrow drawn small (say, 24×24) in the middle of a 128×128 canvas ends up around 6 pixels wide at 32px. The remaining 26 pixels are completely empty space.
Someone downloading that cursor cannot fix it by cranking up their mouse pointer size slider in Windows settings. Making the cursor bigger in Windows just scales the empty padding too, leaving a tiny shape surrounded by a vast invisible moat. The only real fix is redrawing or cropping the canvas.
Downscaling also softens pixel art
Beyond the size issue, extreme downscaling is rough on detailed artwork, especially pixel art. Going from 128px down to 32px is a 4:1 reduction. Nearest-neighbor scaling throws away three out of every four pixels, which breaks single-pixel outlines into dashed lines and deletes fine details. Smooth filtering averages adjacent pixels together, turning sharp black borders into blurry grey halos. If your drawing was already tiny on the canvas, downscaling leaves barely any pixels to convey the shape at all.
The site downscales your files too
When you upload a cursor, our processing engine downscales high-resolution artwork to generate standard smaller sizes (down through 96, 64, 48, and 32) for multi-size downloads, previews, and website CSS embeds. If your source canvas has huge empty margins, every generated preview and download inherits that exact same wasted space.
What to aim for:
- Match your canvas size to your drawing. If you're creating a 30×30 pixel arrow, draw it on a 32×32 canvas rather than a 128×128 canvas.
- 32×32 is our minimum canvas. Anything smaller doesn't give Windows enough pixel data to scale properly.
- Leave a little breathing room. You don't have to jam your artwork hard against the edges. A couple of pixels of margin for drop shadows, glows, or outlines is perfectly fine, but don't leave half the canvas empty on sizes above 32x32.
- Draw dedicated smaller sizes if you want peak sharpness. The editor allows multiple sizes per cursor. Hand-drawing a 32px version will always look crisper than an automated 128-to-32 downscale because you choose exactly how each pixel lands. Small artwork like 16x16 should always be done on 32x32.
3. Check animations for accidental blank frames

Windows plays animated cursors frame by frame according to their set delays. It doesn't skip empty frames. If a frame exists with nothing drawn on it, Windows displays that empty canvas for its allotted duration.
This results in an annoying flicker where the cursor vanishes and reappears several times a second while moving across the screen.
This almost always happens on frame 2. While experimenting in the timeline, it's easy to click "Add Frame," decide to do something else, and forget to delete the unused blank frame. Because a blank frame's thumbnail is just a transparency checkerboard, it can easily blend into the timeline unnoticed.
Before submitting an animated cursor, play it back in the timeline or in Live Preview. If it stutters, blinks, or flashes, check your frame list for an empty frame and remove it.
4. Submit finished, quality artwork
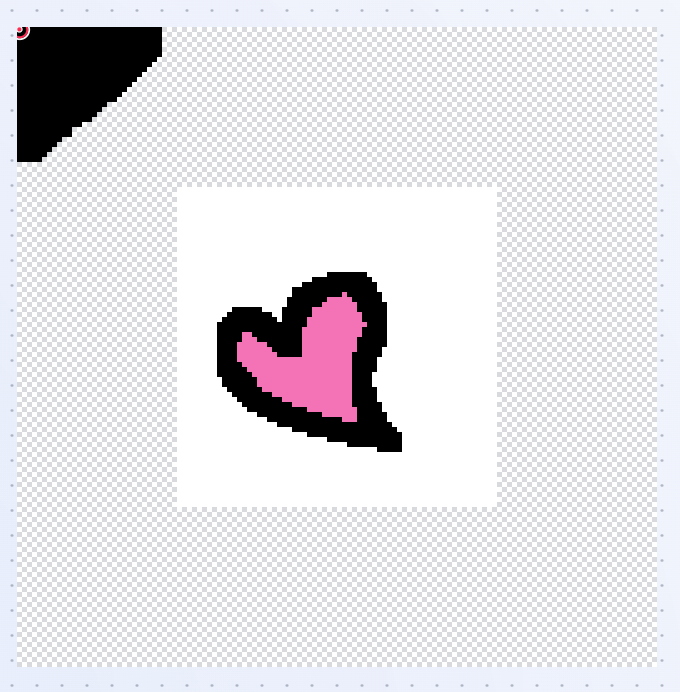
Cursors-4U has been running for more than twenty years, and our library has always been curated by hand. When someone downloads a cursor from our site, we want them to get something well-crafted that looks great on their screen. We'd rather keep a smaller catalog of quality cursors than fill the site with clutter that people have to dig through.
Art quality is always subjective to some degree, but our moderation criteria focus on polish, clarity, and usability. We regularly decline:
- Photos, logos, or screenshots roughly clipped into a square with rough backgrounds, jagged white fringes, or checkerboards still attached.
- Low-resolution artwork upscaled with visible blur, heavy compression artifacts, or pixel mush.
- Hasty scribbles or incomplete sketches with no clear shape or intent.
- Distorted artwork where a non-square source was stretched and warped out of proportion.
- Designs where it's impossible to tell where the cursor is pointing or which part interacts with the screen.
- Unfinished work with accidental stray pixels
- Don't submit animated cursors with hidden or inappropriate frames. The mod team, gets a sprite sheet to review.
If your submission gets turned down, please don't take it personally. Most declined cursors just need a quick touch-up or a cleaner cutout. We would much rather help you get a polished version into the library.
Quick Submission Checklist
- Hotspot is placed on the active tip or interaction point.
- Artwork fills at least 80% of the canvas area.
- Canvas size is at least 32×32 pixels.
- Animations contain no accidental blank frames.
- Artwork is finished and clean, not an unedited photo crop or rough draft.
- Titles and descriptions should be clear about what it is.
What's New in the Cursor Editor
Clear guidelines help, but the best way to prevent these issues is to catch them while you're still working in the editor. Over the past several updates, we've built tools directly into the editor interface to identify and fix these common problems automatically.
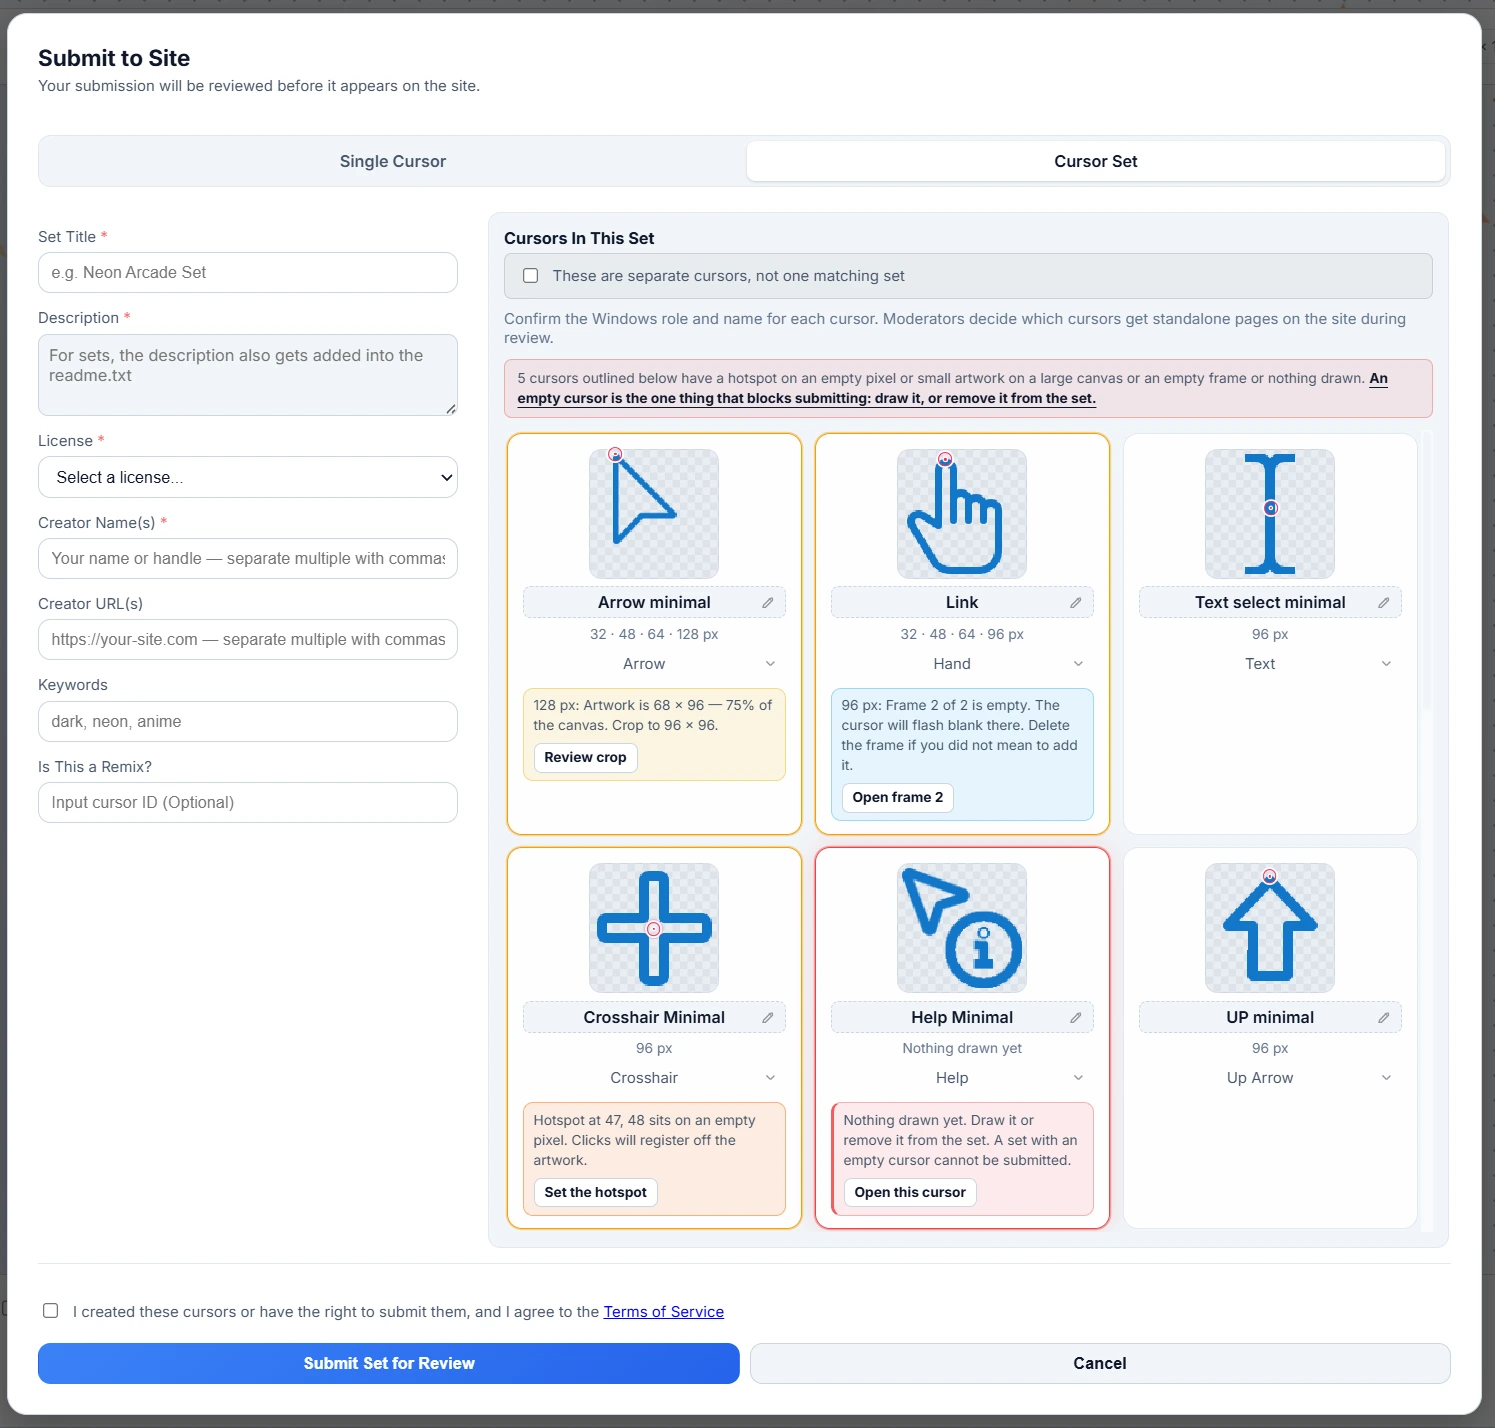
Pre-submission review cards
When you click Submit, the editor now inspects every cursor in your workspace before opening the submission details form. Each cursor gets its own review card showing a preview, its canvas sizes, and its hotspot position:
- Hotspot on empty space: If your hotspot sits on transparency, the card flags it. A hotspot you deliberately moved gets a gentle warning, while a hotspot left on the default 0, 0 corner gets a clear alert. Clicking Set hotspot jumps straight to that size with the hotspot picker active.
- Small artwork on canvas: If your artwork fills less than 80% of the canvas, the card flags it and shows a dashed box around the true boundaries of your drawing. Clicking Review crop opens the Crop panel with a recommended target ready to apply. If all sizes share the same issue, the card summarizes it cleanly instead of repeating warnings.
- Empty animation frames: If any frame in an animation is completely blank while other frames have artwork, the card highlights the exact frame numbers. Clicking Open frame selects that frame immediately so you can draw on it or delete it.
- Blank cursor: An entirely blank canvas is the only check that strictly blocks submission. Everything else is advisory. If a check triggers on something you intended as part of your design, you can review it and proceed anyway.
Issues are color-coded so they're easy to scan: hotspot notices are orange, canvas fill notices are yellow, animation frame notices are blue, and critical or blocking notices feature a red accent.
The Crop tool (Shortcut: C)
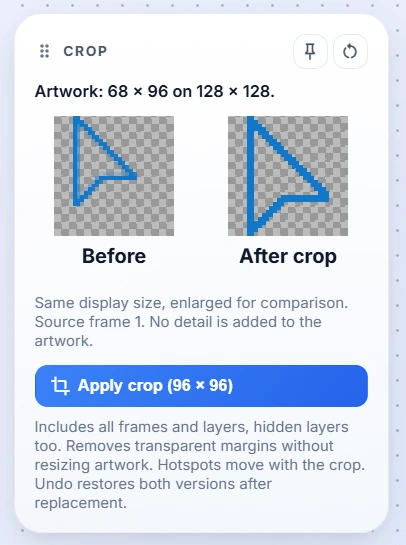
If you find that your artwork is drawn too small on a large canvas, you don't need to manually redraw or copy layers. We added a dedicated Crop tool to the toolbar (shortcut C).
The Crop tool scans across every layer and frame (including hidden layers) to calculate the exact bounding box of your artwork, then crops away the excess empty padding onto a smaller canvas. Your artwork is never stretched or resampled, and hotspots are automatically shifted so they point to the exact same relative pixel:
- Apply crop: Automatically trims down to the smallest standard canvas preset (such as 32, 48, or 64) that cleanly fits your artwork.
- Tighter crop: For artwork that falls between standard sizes, this option lets you trim tightly to the drawing's exact square dimensions.
- Before and After preview: Shows both versions side by side at matching scale before you commit.
- Conflict prevention: If cropping down would match an existing size already in your cursor project, the tool displays that existing version for comparison and asks you to confirm before replacing it.
- Safe and undoable: The crop tool respects our 32×32 minimum canvas floor, prevents accidental clipping if artwork touches an edge, and can be completely undone with a single
Ctrl/Cmd+Z.
Importing cursor packs and archives
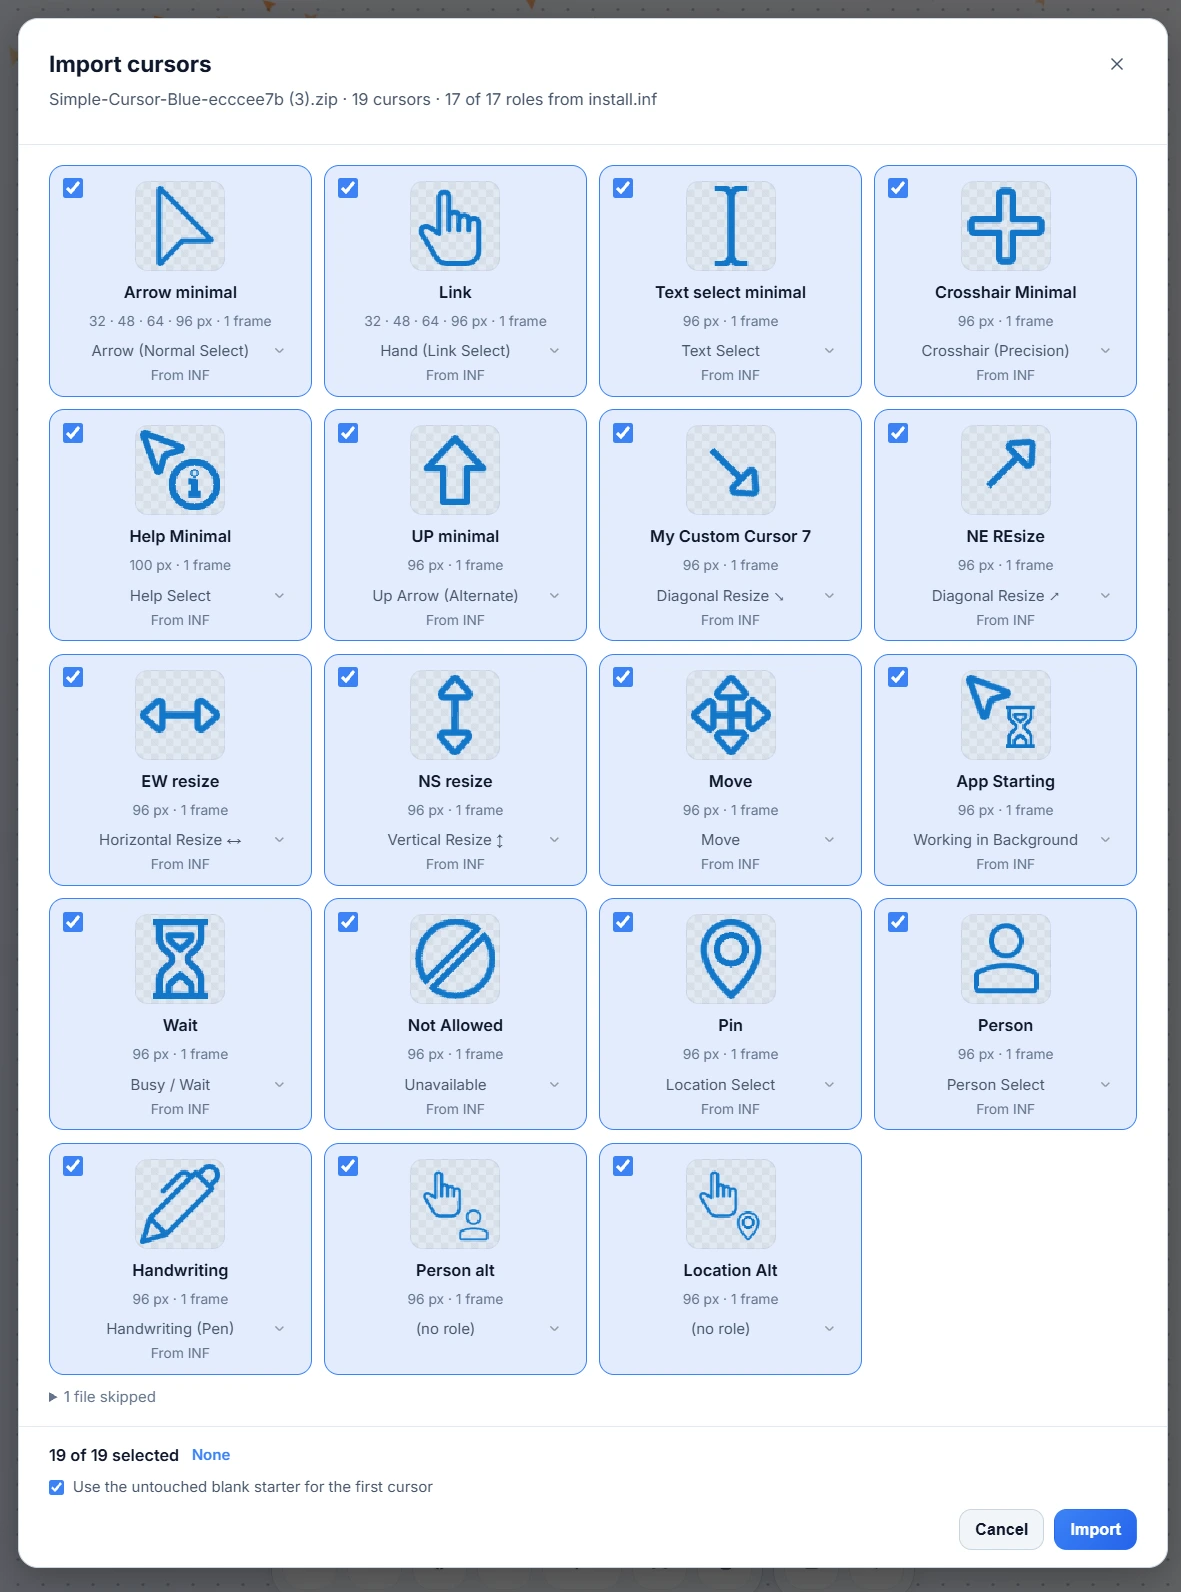
We've also made it much easier to bring existing cursor sets into the editor. You can now import loose .cur and .ani files, or complete .zip and .7z archives, handling up to 60 cursors in a single batch.
When you import a pack, a review modal lists every cursor found, complete with names, dimensions, frame counts, and animated hover previews. If the pack includes a Windows install.inf file, the editor reads the text to automatically map cursors to their proper Windows system roles (Normal, Help, Working, Busy, etc.), saving you from having to assign up to seventeen roles by hand. The INF is parsed strictly as safe text, never run as code.
Everything runs entirely client-side inside your browser using fast WebAssembly decoding. Nothing is uploaded to our servers until you decide to submit. There's now a dedicated Import button in the Workspace panel (you no longer have to drag and drop files onto the window), and an Undo import option lets you clear an entire imported batch in one click if you grabbed the wrong folder.
To support full Windows schemes, we also expanded the workspace project limit to 60 cursors per set, with a daily submission allowance of up to 180 cursors.
Full documentation available
All of these tools and workflows are documented in depth in our editor guide. Check out the Drawing Tools guide for crop details, Submitting to the Site for complete review card definitions and upload limits, Importing Cursors & Archives for pack and archive imports, and Image to Cursor for turning a single image into a cursor. As always, you can track every tweak and fix in our Version History.
Wrapping Up
Our goal with these checks isn't to force every cursor into a rigid mold or restrict your artistic style. They exist to catch the subtle technical quirks that turn a fantastic piece of art into an unwieldy cursor on somebody's desktop.
If the editor flags something that was an intentional design decision, feel free to submit anyway and let us know in your description. And if you ever run into a case where the editor gave you a green light but moderation flagged an issue, send me an email at tor@cursors-4u.com so we can tune the checks.
Thanks for creating, sharing, and helping keep Cursors-4U vibrant after all these years. Happy drawing!
Comments