Date: 8 Apr 2016, 11:35 By Tor With 16 Comments
Hello, I'm back with the latest tutorial on how to change/install/add cursors (mouse pointers) on your windows 10 computer desktop. It's simple and pretty much the same thing as any other windows version operating system.
1. Find The Cursor
Look through the site, and look for the cursor you want to use. The navigation of the site is on your left. Click on any of those links. You can also use the Search.
Date: 8 Dec 2011, 14:10 By Tor With 19 Comments
A user had left a comment on how to add cursors on weebly so I decided to go ahead and create a very simple tutorial on how to do this. Weebly is a social network like tumblr that allows anyone to create a website.
And it so happens our cursor codes work for the site, but you have to take a few extra steps to set it up. So lets begin the very simple tutorial on how to add cursors on Weebly.
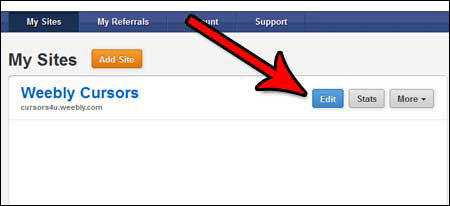
- Login and go to your Weebly page.
- Click on "Edit"
Date: 17 Nov 2011, 16:44 By Tor With 22 Comments
After some complaints about the cursors still not showing on some users tumblr page, I have another option that should get it to work. First you have to understand that, the reason that these cursors don't appear is not because it's our fault. It's because our CSS codes is conflicting with some users tumblr themes or some of you guys don't follow the instructions. Mostly though a lot of these custom themes that you find on resource sites are pure garbage. Get your themes on tumblr itself, atleast most of them are coded "correctly"
Here is the third and final option that some of you guys can try. If this don't work I don't know what will. Sorry, I will not look for another option.
- Login and go to your Tumblr page.
- Click on Customize
- Click on "Edit HTML"
Date: 4 Nov 2011, 10:50 By Tor With 34 Comments
There have been a few questions regarding the installation of cursors into Windows. I have a basic guide on how to do it on Windows XP but I guess it's confusing. So I'm writing one up specifically for Windows 7, and Windows Vista as well. All our cursors are checked to be working with Windows XP, Vista, and 7 so there shouldn't be a problem. Also it probably will also work with Windows 8.
1. Find The Cursor
Look through the site, and look for the cursor you want to use. The navigation of the site is on your left. Click on any of those links. You can also use the Search.
Date: 2 Sep 2011, 16:39 By Tor With 10 Comments
There is now a new "tab" on each cursor page that shows you how to add cursors into your blogger/blogspot websites. Just read the instructions and it should work. But remember that animated cursors only show on IE. And btw, I definitely should have done this a long time ago. Blogger is the most popular blog service in the world isn't it? But now you can rejoice.
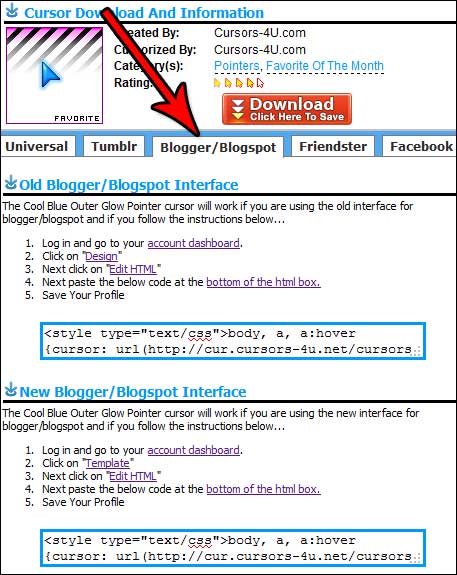
Here's the basic run down of how to do this...
- Log into your account and click on Design
- Next click on Template
- Next click on Edit HTML
- Paste our cursor code at the very bottom after </html>
- Save your changes
Honestly you probably don't need to backup your template, but if you want to, go ahead. You usually don't paste CSS codes at the bottom of the page, but because some people have different templates, I thought having it at the bottom was easiest for people to figure out where to paste the code.
If you want pictures and stuff, go ahead and go to a random cursor page, and click on the "Blogger/Blogspot" tab and read the instructions. There are images as well if you can't figure it out.
Whoopie doooooo! This is my first update in over 5 months. Also one other thing. I removed the myspace tab, and yup, I replaced it with the blogger/blogspot tab.
Date: 6 Mar 2011, 11:43 By Tor With 3 Comments
Cursors-4U.com is one of the most popular cursor website in the world, I think and that is because of hard work that I put into this site throughout the years. However, we do not have every cursor there is, there are plenty of good sites to get free cursors other than Cursors-4U.com. Though I rather you guys get cursors here =D, I've like to still recommend some places.
Check out my list below! I'm gonna rate them just base on three categories, Good, Okay, and Bad, with a short review of each site.
Date: 13 Feb 2011, 15:18 By Tor With 40 Comments
4/1/2013 - CURSORMANIA IS NO LONGER IN BUSINESS
Hello, this a review of the program by Mindsparks Interactive, called CursorMania or Cursor Mania. If you have been searching for cursors, you probably came across this program. The program is part of a line of products that installs a toolbar called MyWebSearch. There have been many questions regarding the safety of this product but today I will ignore all that and review the product only. My next post will dwell into the spyware, adware, malware, virus aspect.
For this tutorial/guide/review I have installed a fresh couple of CursorMania. So everything that I show is the current version of the program.
Installation
During the install process it will ask you if you want to make MyWebSearch, the default search engine, as well as the homepage. Also it will ask you to install Norton Internet Securities. That is up to you what you want to do.
So when you install CursorMania, you should get a new toolbar on your Browser. I believe CursorMania works on Mozilla and Firefox only. The toolbar looks something like this...

Along with Cursor Mania you also get Smiley Central, Screensaves, and MyFunCards. One other thing to note, is that along with the toolbar that is installed, you will also get some new startup items during the Windows boot. These items as they appear on msconfig are...m3SrchMn, and mwsoemon. I do not know what these processes do, but from installing toolbars of other products in the pass, none of them have installed any thing else in the Windows StartUp.
Date: 24 Jan 2011, 20:24 By Tor With 10 Comments
So I been getting a lot of comments about why you can't open a .cur or an .ani extension. And when you try to open it, just a bunch of random text comes up. Obviously those text are the cursor code put into text format. You also can't open them up because you don't have the right programs to. It's like trying to play a mp3 file with your photoshop software. It's not going to happen.
So today I'm putting together a simple list of some cursor programs and editors. You can use these programs to open the cursor files. Some of the software will be free and some will be paid. If they are paid software, they will probably come with a 30 day trail period. I"ll separate the two though so it's easier for you to pick. This is a list of programs/software that I have personally tried, except for one.
Date: 20 Dec 2010, 09:47 By Tor With 61 Comments
So you want to know how to add Cursors on your
tumlbr page eh? Alrighty then. You came to the right place espesically for the best cursors in the world!
Browse our selection of cursors and pick the one you want. Do not choose a cursor set, because you'll need an individual cursor. Grab the "Universal Code"
Date: 9 Oct 2009, 11:44 By Tor With 10 Comments
Hey hey, just wanted to do a new quick tutorial on how to remove the link back that we leave your page. I'm telling you guys because though having a link back to our site is nice having an ugly advert on your page is pretty suck. It's pretty simple to remove it. First we will begin by removing all the red highlight.
<style type="text/css">body, a, a:hover {cursor: url(https://cur.cursors-4u.net/others/oth-4/oth392.cur),
progress;}</style><a href="https://www.cursors-4u.com/" target="_blank" title="Cursors"><img
src="https://cursors-4u.com/support.gif" border="0" alt="Free
Cursors" style="position:absolute; top: 0px; right: 0px;" /></a>
Keep the rest of the code. It's that simple =D What about for Myspace 2.0? Well for Myspace 2.0 if you read our instructions on each of the cursor page, to not leave an advert on your site all you have to do is only follow step #3 and up.
For Freindster start from Steps #5. And for Hi5 starts from step #3 and upwards.
If you remove our link back advertisement we won't hunt you down. However we would appreciate it if you link back to us in a blog post or something. Saying something like "Hey! I got my cursors at Cursors-4U.com!"


 New And Hot
 Site Links